Showing posts with label Gold. Show all posts

Wednesday, July 3, 2013

Backyard Bash


Welcome to our latest backyard bash that we had the honor of decorating for. It was elegant, simple, modern, sophisticated yet laid back, shabby chic - I was so honored to be asked to be their decorator.

I first met with them for our first meeting at their house and was automatically in awe.....the gorgeous landscape, the wood work, down by the river - it was already stunning! They had told me how they were going for the "Let nature speak words" type of thing yet modern, formal, but not too formal simplistic & the rest was up to my imagination & let me tell you what I had so idea running through my head I almost couldn't concentrate :)

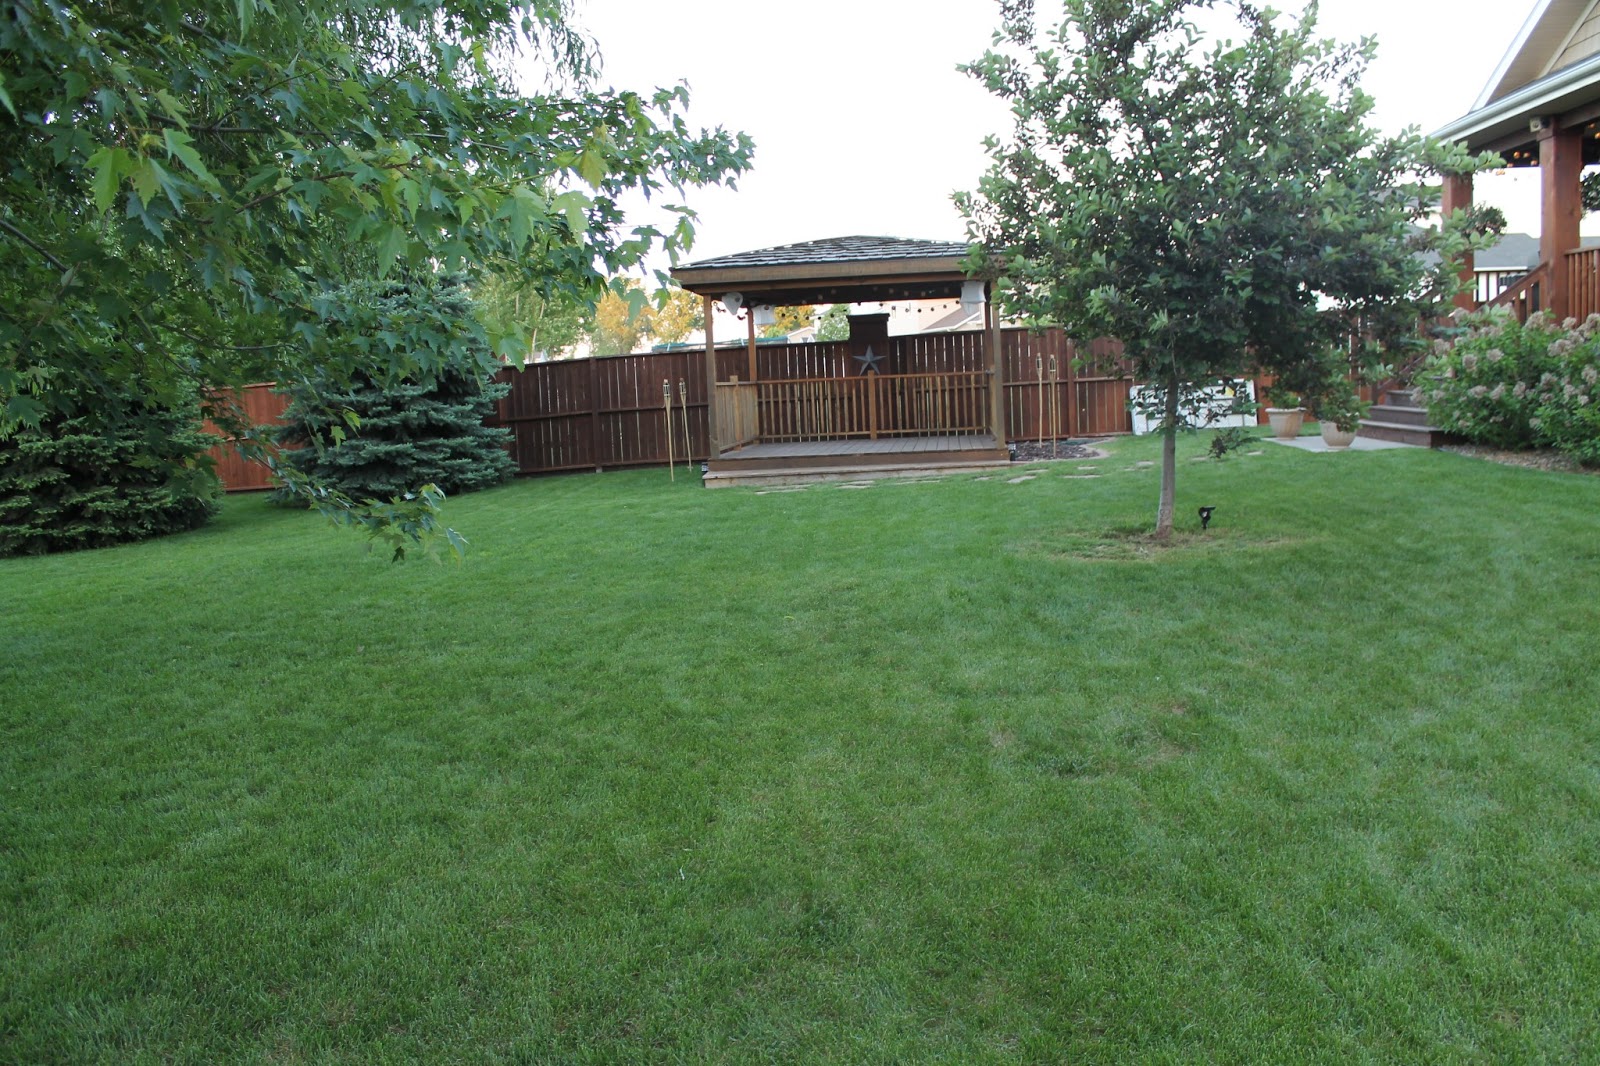


Here is how their backyard looks without anything added to it - Nice right?

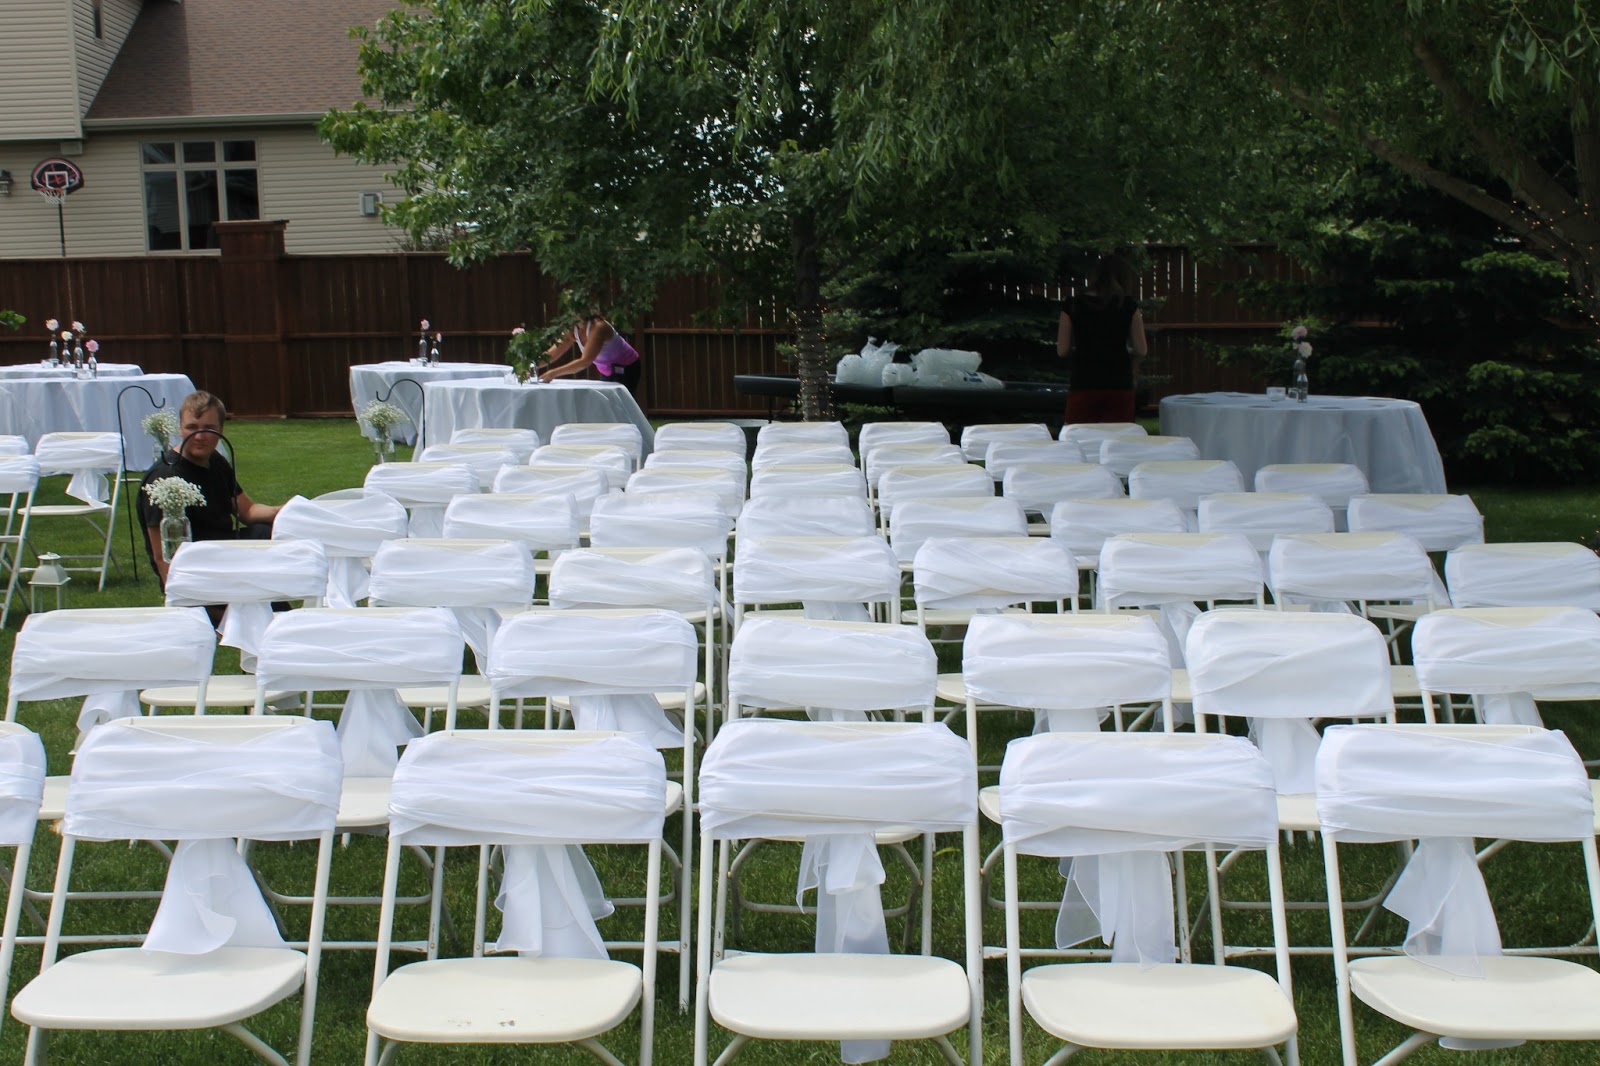
We added minimalist decorations that made a HUGE impact on the space - white floor length table cloths, with white shimmery organza overlays, white folding chairs with double sashes to match the other table linens, aisle decor, "altar"decor, simple, minimalistic centerpieces & we did a few other things. Take a look and see how we transformed this space. 

Notice all the small details - hanging mason jars with baby's breath, wood slabs with lanterns, beautiful dahlia flowers, linens, lights around the trees, Globe string light backdrop, drinks.....details make the event YOUR EVENT.




Friday, April 26, 2013

DIY Centerpieces...Everything that Glitters

With everyone wanting to add that personal flair to their event & also be able to save their money a bit the DIY centerpieces is a huge craze right now. This idea would be great for any event: baby showers, bridal showers, birthdays, weddings, new years eve party & so much more. My sister was planning a gender neutral baby shower. The theme was rustic chic & she had decided the color scheme would be burlap, ivory & gold accents & mason jars. 

These are some very cool, easy, cheap, & gorgeous centerpieces we made for the shower. 

Supplies:
Mason Jars (she got hers from the Dollar Store)
Spray Glue (she got hers form Hobby Lobby)
Glitter of choice
paper & scotch tape
Flowers to put in the jars

Instructions:
1. Wrap the part of the jar that you DO NOT want any glitter on with paper & scotch tape
2. Spray the glue all over the area you want the glitter to be. It is easy to see where you have sprayed as the area will appear cloudy. Remember to spray in a well ventilated area!
3. Sprinkle the glitter on the area you want covered. We tried rolling the jars in the glitter, but sprinkling the glitter on by hand seemed to work the best. My 4 yr. old loved doing this part!

4. Take the paper off & voila you are done. Easy, Fast, Inexpensive & gorgeous..doesn't get any better than that!


Here they are completely finished with the flowers in them.


Friday, April 12, 2013

Strike A Pose! Continuing Trend into 2013

Have you ever attend a wedding reception gone to cocktail  or social hour & you just kinda feel like there isn't a lot to do, so you are just kinda hanging out until the supper & dance starts? Well we have just the thing for you! Entertaining your guests is a HUGE part of every wedding - you want your guests to go away from your event saying "this was the best ever" or "I haven't had this great of a time at a wedding in a long time." Let's face it you want your guests to remember your event & be the first thing people think of when they hear the word wedding - fun, eventful, memorable, & beautiful! 

Photo booths used to be used more so for the birthday party & high school type of events, but why not have them at your wedding? They are fun & entertaining! Photo booths showed up at weddings in our area about 2 yrs ago & have become very popular. They are great to use as favors for your guests or just to add that extra fun to the night to keep your guests engaged & socializing.

 Now you can either hire a professional company that specializes in photo booths for you, see if your photographer offers some type of photo booth thing (as many do now), or you can create your own photo booth -adding personality & charm to your event.

The newest Trend right now is the DIY photo booth & we love this concept! I mean the possibilities are endless, you can create it for next to no money, you get to be creative, it will be one-of-a-kind & guests will feel more connected to you & your event.

Make it as fun, silly or chic as you want all these are found Via Pinterest


Sunday, March 24, 2013

Champagne Inspired Backdrop


I had the great honor of decorating for another corporate event, this time for RSVP+ ND. They were having their annual Bags, Baubles & Bubbly event & had asked if we would like to donate our services & I love to give back to the community & give to great causes so I was thrilled to be able to tell them it would  be our honor.

The Bags, Baubles & Bubbly Event is an event for basically women, you will understand why I say that in a bit, where women par-take in auctions for phenomenal items which some include: fine jewelry  champagne brunch for 8 of your friends, spa day packages, vacation packages, 50 shades of grey basket, Miche, Prada, Michael Kors & Coach purses with all the proceeds go toward the RSVP+ ND group. Now do you know why I say it is mainly an event for women :) The highlighted event of the night is the champagne toast which is  where each guest gets a champagne glass that contains a blue velvet bag in it that has a stone in the bag. If you are the lucky lady that ends up with the red stone in her bag then you are the proud owner of the gorgeous diamond necklace that was donated by Zorell's jewelry store here in Bismarck.

I had a blast planning the decor for this event, I mean with champagne, diamonds & crystals as my inspiration what girl wouldn't be in heaven.  some pictures of our champagne inspired backdrop for the champagne table.

Here are the instructions of  how I made it:
1. Collected many sheets of 12 X 12 scrap book paper the heavy duty stuff. I used metallics' - silver, copper, gold, textured & non-textured

2. Cut the circles out of the paper using your cricut machine.( I used various sizes of circles because I wanted the circles to be larger at the top than at the bottom to mimic champagne bubbles.) so I used 4", 3" & 2 3/4" circles.

3. After I had all the circles cut & sorted by size & color. I started to make the actual backdrop itself.
Now I started out sewing the circles together in a straight line, but then for some reason my sewing machine started acting up & I got frustrated so I went to plan B :) which was to hang the fishing line from the ceiling and cut to the length I wanted it to be.

4.Then I picked out the colors & sizes of circle I wanted for that" string of champagne"

5. I just used tape to tape the circle onto the fishing line in the order & spacing I wanted them, & that's it!

Super fast, Easy, & makes a big impact!

I had a 16 ft. area I wanted to cover with my backdrop, so as you can see I had 8 strands of "champagne" with 8-12 circles of each strand, depending how long you want the strands to be & how close you space the circles together.) I also used ivory hanging rose balls hung from crystals at various heights and I used 8 of those. so if you wanted to do a complete backdrop of the champagne bubbles then you could use 16 strands to cover a 16 ft. long area like I did.

I also had my "backdrop" hung right over the table of champagne glasses instead of behind the table so that is why I made my strands shorter. If I would have been putting them behind the table like a true backdrop then I would have made them much longer, but you get the idea.