
I am going to try & tell & show you how I made my pillowcase dresses & each of them are all a bit different, but again WARNING: I AM NOT A SEWER BY ANY MEANS so please excuse the pictures & my bad sewing job, but hey it got he job done :)


Supplies needed:
Fabric(s) of desired length (depending on what size you want to make it) I used actual pillow cases
Scissors
Pins
No Sew Hemming Tape
Iron
Ribbon
Step One: Cutting your fabric
Take your pillow case that you will be using for the main color of the dress & cut the already sewn together top straight across the top.
Step Two:
Cut straight across what I am going to call the bottom of the pillow case where the hemmed edge is at. Now you should have a a big tube of fabric - this will be the main part of the dress.
Step Three:
Now on that tube of fabric cut down one stitched side & cut the existing stitch of the pillow case off, so it is now one long wide piece of fabric (with one stitch still in the long piece of fabric).
Step Four:
Take your second fabric (or pillow case) that you would like to use for an accent piece on the bottom of the dress. Cut a strip that is 1 1/2" wide. If you are using a pillow case as I did again cut one of the already stitched sides off, & also cut a 1 1/2" X 30" long piece of fabric.
Step Five:
Take your third fabric (or pillow case) that you would like to use for the very bottom on the dress. Cut a strip that is 3" wide & again cut one side of the stitched pillow case off if you are using a pillow case.
 |
| Here is a look at the three pieces now cut. |
Step Six:
Place the no sew hem tape across the top of the first piece of fabric & do as the directions on the no sew hem tape indicate - lay it down straight across the top of the fabric & iron it down.The white part of the tape should be facing up.

Use your finger nails to rip off the WHITE part of the hem tape, leaving the clear part of the tape on your fabric

Take your raw edge & fold it up over the tape & iron it down. You now have a hemmed straight edge & it was super easy!
 |
| This is my third fabric that will be the bottom of the dress with the "hemmed" edge facing the left & the raw edge facing the right - see the difference? |
Repeat steps 6-8 for both the top & bottom of all three of your fabrics.
Now that you have the 3 fabric pieces prepped, we get to actually start get to start assembling the dress :)
Step Ten:
lay on fabric pieces with wrong side facing up. Arrange the fabrics in the order you want them to be & pin into place.


After you have them all pinned into place sew a straight line down where you have pinned. (on mine I am sewing the pink fabric to the solid black & the floral black & white print to the pink.)
Step Twelve:
Now with the wrong sides still facing up, fold the dress in half vertically & pin together.
 |
| on the left you can see the side I need to hem & on the right side you can see the already hemmed side of the pillowcase. |
Sew down the edge you just pinned. you can either do a straight line or a zig-zag. On this dress I decided to do a zig-zag, on my other dress I did just a straight line & it worked just fine.

Now that you have an actual form of a dress, you may be getting excited & you should be :)
Step Fourteen: Cutting the arm holes
Fold the dress in half vertically again, So you have your sewn sides on the right side. Take a pin & pin the left corner, just so things stay in place. For my 4T & 5T dresses I measured 2" in from the left hand top part of your dress corner & 4" down. Make a free hand" J" connecting the two measured places & cut along that "J". Don't worry about cutting straight it gets all covered trust me.
 |
| If you look closely you can see my "J" |
After you have cut the arm holes, open up the dress so you can now see the dress as a true form coming together

Step Sixteen: Accenting the arm holes
Now this is the trickiest part of me to not only do, but to also explain, so hang on.
Take the 1 1/2" wide X 30" long piece of fabric (mine was pink) and lay around the arm hole, right strip of strip to wrong side of dress. (Your dress should still be inside out at this point). Stitch the fabric piece around the arm hole. I found it much easier just to free hand guide this rather than pin it, but do what works for you.

When you get to the end of the arm hole leave an extra 3/8" on the fabric and cut off the rest. (You will be sing the remainder piece of fabric you just cut off for the other arm hole.) Take the extra 3/8" and fold it over (in towards the arm hole) and sewn down into place to finish off the arm hole.

Step Eighteen:
Repeat Step 17 on other arm hole & turn the dress right side out.
Step Nineteen:
Flip the already sewn pink fabric that is around the arm hole over & tuck the raw edge under itself & sew around the arm hole again.

Step Twenty: Making the "pocket across the top to hold the ribbon"
Fold the top edge of the dress on the front side over about 5/8" and sew a straight line across . This creates the "pocket" across the top of the dress that will hold the ribbon. Repeat the same thing on the back side of dress.


 |
| This is what the front of your dress now looks like - excuse my feet in the picture, my house is quite small with not a lot of room to work with :) |
I decided to add an old jean pocket onto the dress to give it more personality.All I did was cut the pocket off one of my kids' old jeans and sew exactly on the gold thread that was already on the jeans & there you have a pocket!

Step Twenty - Two: FINAL STEP
now we want to thread the ribbon through the "pockets" you made at the top both sides of the dress. Take whatever color ribbon you want to use to tie the dress, pin a safety pin on the end of it to feed it through the "pockets". Feed the ribbon through the front top pocket & then through the back top pocket. Once it is fed through both "pockets" leave plenty extra (about 18" or so) on both tails of the ribbon & cut them off.

Enjoy the cute pillow case dress in all seasons, for cooler seasons put a long sleeve shirt under it or a cover up over your arms to make it four season acceptable!

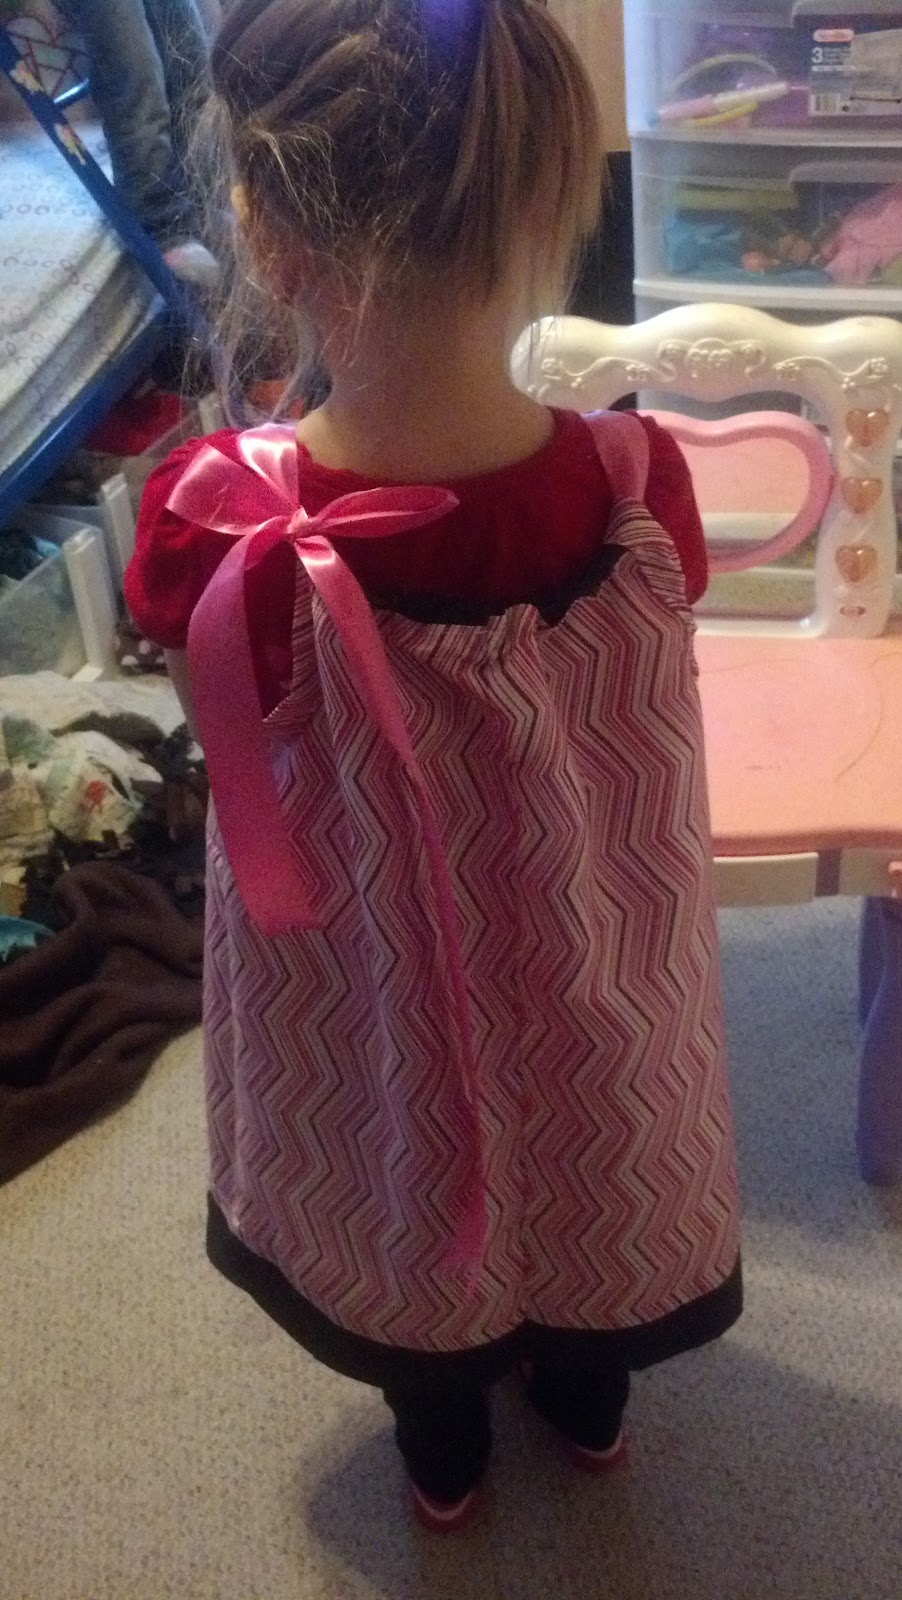 |
| With it tied in back |
 |
| Front of dress with ruffle detail |
 |
| Up close of Ruffle Detail |
 |
| Tied on top of the shoulder |
No comments:
Post a Comment
Please leave us your feedback