Showing posts with label Recipes. Show all posts

Monday, October 14, 2013

My Twist on Fried Ice Cream

I LOVE fried ice cream & everything about it. It is crispy, cold, yet warm, melts in your mouth & you can top it with whatever you would like. Plus it brings back a lot of great child memories for me. So tonight I decided to do my own modern take on fried ice cream with out all the mess of it.

 I used egg roll wrappers and cut them in half. Then on each piece of egg roll wrapper I did a nice size dollop of nutella in the middle. Wet the edges with water & fold and seal the egg roll wrapper to itself. Drop it in the deep fryer for just a few seconds until it's a beautiful golden brown color. take out of the fryer & immediately sprinkle with powdered sugar. Put your desert in a bowl add a scoop of ice cream & top with fresh fruit of you want.

I call it my Twist on fried ice cream because it has lot of the same characteristics that I love about traditional fried ice cream, without the mess of making it & without the mess of the ice cream in my deep fryer.

There are so many options with this. As I was making these for my kiddos I was thinking about our camping trip we will be taking this weekend. Why not try adding marshmallows inside it for s'mores, or peanut butter for Reese's, or toffee pieces for a Heath bar? I mean the possibilities are endless.

Thursday, September 19, 2013

How to crisp up your spinach or lettuce

Spinach is a green that is a staple in my house, but it seems like no matter how much I use it & how fast I try to use it, if I do not store it in a air tight mason jar that is just seems to wilt or get softer than I would like before I would like. The other day I was talking to my husbands' grandma and she said something about trying to give it an ice bath, so does it on her lettuce & stated " I don't know why it wouldn't work for Spinach." Well I got off the phone with her to give it a try and much to my surprise it worked fast & great!!

All you do is literally give it an ice bath. place your spinach, or lettuce, in a bowl, cover in cold water & a bunch of ice cubes. I let mine set for about 10-15 minutes. Drain it, dry it & voila you have crisp spinach again. Easy right?

Tip: as mentioned earlier I do usually like to store my spinach & lettuce in air tight mason jars & it keeps for weeks on weeks - nice & crisp & does not get soggy or turn brown.

Monday, September 16, 2013

Shrimp Scampi Pasta

This is a dish I created that I am calling Shrimp Scampi Pasta. I wanted Shrimp for supper the other night, but I did not want some deep fried, heavy in cream & sitting in butter shrimp that would just make me feel heavy & ugh. So I decided to create my own dish & it turned out heavenly if I do say so myself! It was simply shrimp that was sauteed in a bit of EVO, Lemon juice, fresh garlic, lemon seasoning & some chicken broth all on a bed of fettuccine noodles topped with some fried wonton wrapper strips as "croutons" served with fresh raspberries. Oh yes and we decided to sprinkle some Parmesan cheese on top of the pasta to finish it off. Enjoy!


Monday, August 26, 2013

Daily amount of fruits & vegetables

How many of you actually get the recommended amount of fruits & vegetables every day? Yeah, that's what I thought...not too many. Now I LOVE my fruits & enjoy vegetables, but I can not honestly say that I get the recommended amount each day.
For my last birthday I decided to buy myself a much needed & wanted gym membership. Not only did I want to join a gym to get back in shape, tone & tighten things up a bit, but also it is actually my relaxing time (my gym offers daycare, so I get to put my kids in there for an hour), It helps me relieve stress, gets me energized, makes me want to eat healthier & just makes me feel better about myself even if nothing physically has changed yet. So in efforts to eat healthier & lighter I have been making myself smoothies for my breakfast & for my lunch. My basic smoothie recipe consist of a liquid, fruits &/or vegetables & my soy powder enhancer I have been using. Since I have been trying many different recipes I wanted to share some of them with you, so you can try them out yourself. I only use fruits & vegetables that I already have in my house. I am not one of those who follows a recipe (which you can find all over the web), I just make do with what I currently have. As long as I am getting fruits & vegetables it has to be some what good for me right?

Green machine
handful of spinach
1 whole banana
1 pink crisp apple
8oz. skim calcium milk
1 scoop full of my chocolate EAS soy protein
mix in blender until smooth

Pretty in Pink
2 double handfuls of pitted cherries
2 handfuls of red seedless grapes
1 whole banana
8oz. skim calcium milk
1 scoop full of EAS soy protein
mix in blender until smooth

Pomegranate Punch
2 containers of pomegranate Yoplait light yogurt
2 handfuls of pitted cherries
1 handful of watermelon
1 scoop of EAS soy protein
mix in blender until smooth

Make my mouth Water
 4- 5 heaping handfuls of watermelon
1 1/2 cups of plain Greek Yogurt
1 scoop of EAS soy protein
mix until smooth

I am sorry I did not take pictures of any of these, but they are in my opinion very delicious, smooth, & ties you over until lunch. These are great for on the go people like me, or I like to make one on my way to the gym each morning, or if I know I will not have time to eat a healthy lunch so I don't have to settle for fast food or convenience store food. Please share your recipes if you have any. I love to try new ones!

Wednesday, August 21, 2013

3 Ingredient Chokecherry Jelly/syrup

 Let me let you in on a little secret....for mouth watering chokecherry jelly or syrup you do NOT have to spend countless hours over a hot stove, days preparing, you don't have to have your grandma's recipe, you can make it with very few ingredients & you don't have to be Suzy homemaker! I know it is great news! Last Christmas for a few gifts I decided to try my hand at making some homemade jellies for the first time ever, I know how cruel of me.....experimenting on family & friends for gifts...but really what better time? ;) Back then I had made the usual's - strawberry, blackberry, & peach all turned out great. I gave them with a loaf of homemade bread, who can resist that right?
One morning I was outside in our yard and seen the abundance of chokecherries that were on our trees & then it hit me - why not make chokecherry jelly? I mean it is never too early to start thinking about Christmas gifts, or back to school teacher gifts, or let me brighten your day gifts. And I wasn't going to see the chokecherries just go to waste.

Picking & making great chokecherry jelly
So I gathered up the kiddos and thought I would let them help me in this process. We collected 2 big bowls full of chokecherries, just so I could try it out at first to make sure it would turn out ok.
Then  we made sure each stem was off of each individual chokecherry & picked through them to get the "bad" ones out (this is very time consuming, but you need to do it.) After that step it's easy breezy.
 Put all the cleaned & ripe chokecherries into a pot & barely cover them with water. Let the pot come to a boil & boil until the berries are soft, about 10-15 minutes. Mash the chokecherries still in the pot once soft ( I just used my potato smasher). Once you have them all smashed pour the whole pot through your strainer (put a bowl under your strainer to catch the "jelly")& the strainer should catch all the seeds and most of the pulp.
Pour the bowl of jelly into your pot once again boil & add sugar. Continue to boil for 15 minutes. Now just put the jelly into your desired glass containers & let people enjoy.


Ingredients:
Chokecherries
Water
Sugar (use 1 cup less of sugar than you have chokecherry juice)

Ex: I ended up with 8cups of chokecherry juice, so I used 7cups of sugar.

Obviously I will be sprucing up the tops of the jars for sure - whether I spray paint the lids or cover them in fabric & ribbon is yet to be decided. But add a cute little label & they are ready to hand out ;)

Monday, August 19, 2013

Whole Wheat Healthier Chocolate Chip cookies

As mentioned in some of my previous blog posts I have been experimenting with whole wheat flour. Today I decided to try to make a comfort dessert - Chocolate chip cookies, one of my mother's all time favorite. In fact she always says if she was stranded on a deserted island the first thing she would eat when she got off the island is a chocolate chip cookie :0

I do not take credit for this recipe at all. I got it straight from Betty Crocker all I did was tweek a few minor things.

Instead of the butter I used half of it applesauce & half of it plain greek yogurt. I also added 1/8 tsp. of cinnamon for a little bit more of a twist & instead of sugar I used Slepnda.

They turned out great! Soft, chewy, better for you than orginal chocolate chip cookies therefore you don't feel as bad indulging in one.....that is my thinking anyways. My children had these are bed time snack and my oldest says to me "Mom you are the best cook in the whole, whole, WHOLE entire world, I love your cooking!" I'd say job accomplished - kids are happy & eating healthy without knowing it.

Because everyone needs their chocolate fix every once in awhile

Thursday, August 1, 2013

Camping Recipes & Food List

My family & I just got done going camping for 6 days straight & it was an absolute blast - full of memories, laughs, games, friends, family, smiles, life lessons & LOTS of good food! Just because you are camping does not mean you can not eat good, and does not mean that you have to live off of strictly hamburgers & hot dogs.

Burgers, Brats & hot dogs have been a staple of camping food for years to come & when you think of going camping you probably think of those meats firsts, but I am here to open your eyes up to some "new" camping food that is all very delicious, easy to prepare, will feed a bunch of people & have little clean up afterwards.

First off my list of food I packed:

Breakfast
Pre-made breakfast burritos (recipe at the bottom of the page)
Eggs
Ham (I made before we left)
Pop tarts
Turkey Bacon (I pre-cooked ahead of time)
Pancake mix
Breakfast Whole wheat muffins (recipe at bottom of page)

Lunch
Lunch meat (ham)
Peanut butter & honey sandwiches
Hot dogs

Snacks
Yogurt
Applesauce
Fruit snacks
Pretzels
Cheese
Fruit - peaches, apples, grapes

Supper
Ribs
Elk Burgers
Steak kabobs
Elk Roast

Side Dishes
Cucumber salad
Long grain wild rice
Potatoes

Other items to pack
Onions
Tomatoes
Ketchup
Mustard
Ranch
Butter
Graham Crackers
Marshmallows
Chocolates (or nutella) (this time we brought Reese's, Hershey's, & Kit Kat's)

Day 1 night:
Ham & Cheese Sandwiches made with the pie iron over the campfire

Night snack: s'mores over the campfire


Day Two:
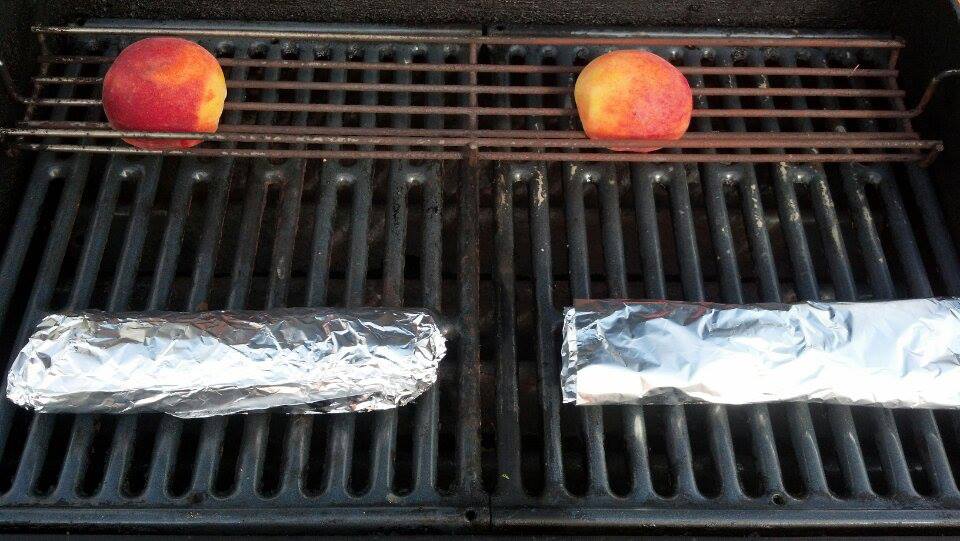
Breakfast: Pre-made Breakfast Burritos warmed up on the grill with grilled peaches


Lunch: Peanut Butter & Jelly Sandwiches with yogurt, cheese sticks, & pretzels

Supper: Steak kabobs with Long grain wild rice. For the kabobs we used some of our deer stew meat chunks marinated them in dry Italian seasoning mix & a little bit of olive oil. served with peppers, onions, tomatoes, mushrooms, & peaches in place of pineapple

Day Three:

Breakfast: Scrambled eggs, Bacon, Yogurt & peanut butter toast

Lunch: Hot Dogs, Chips

We had a bunch of friends come up to camp that night with us for the remained of the weekend & we always do a potluck type of thing for each meal. SO keep that in mind for the rest of these listed meals :)

Supper: Elk Burgers, Beef Burgers, Chips, hot dogs for kids & fruit

Day four:

Breakfast: Pancakes, sausage, bacon, eggs, yogurt, applesauce

Lunch: Sandwiches - peanut butter, peanut butter & honey, peanut butter & nutella with fruit, pretzels & cheese sticks

Supper: Roast, Ribs, Potatoes, cucumber salad, baked beans, & 2 surprise pies for my birthday :)

Day Five:

Breakfast: Pre-made Breakfast burritos, left over potatoes as country style hash browns with ham added in, bacon, french toast, Whole wheat muffins, applesauce, pop tarts

Lunch: Salad, Brats

Supper: Turkey made in the pit (SOOOO yummy) with cucumber salad, fresh peas from the garden, fruit

Day Six:

Breakfast: Leftovers from previous breakfasts'

Lunch: Peanut butter sandwiches for the road home


Recipes:
Pre-made Breakfast burritos
Everyone raved & craved these breakfast burritos & the best thing about them is that they are easy, fast to make, keep for a long time, can be frozen & made from everything you already have at home!


8 large size eggs
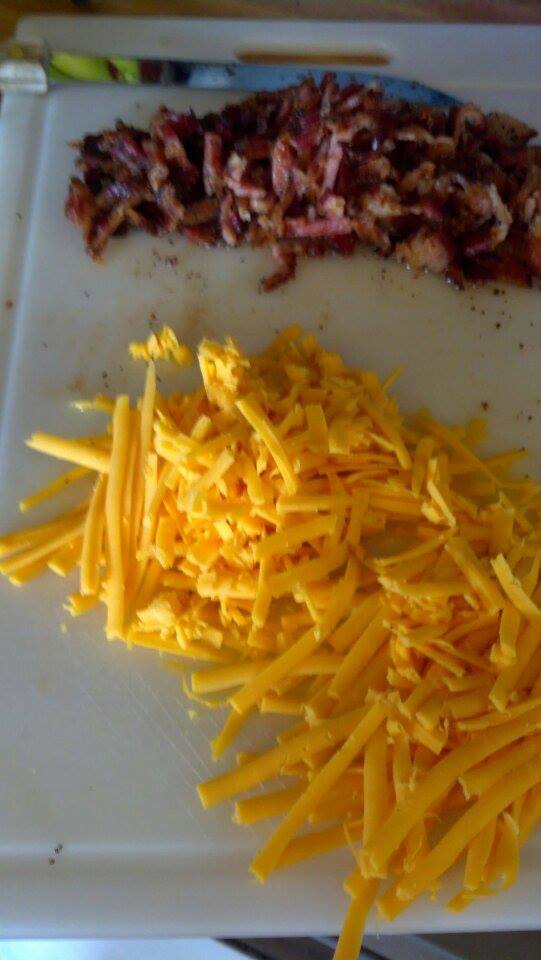
1 pkg. turkey bacon cooked & crumbled
1/4 - 1/2 cup milk
2 cups shredded cheddar cheese
10 flour tortillas
tin foil

1. pre-cook the bacon. I put mine on a tin foil lined baking sheet, in a single layer & throw into a 350 degree oven for about 15 minutes. Let cool & crumble into little pieces.

2. make the scrambled eggs. crack each egg into your pan add your milk (depending on how "wet" you like your scrambled eggs is why I have the varying milk mixture) I used about 1/4 cup milk in mine.

3. Grate your cheese.


4. Assemble the burritos - flour tortilla, eggs, bacon, & cheese, roll up tight & roll up the burrito in a piece of tin foil. store them in a Ziploc bag & freeze or put in your fridge if you will be using them with in 3 days.


Whole Wheat Applesauce Muffins


Recipe from Taste of Sisterhood. the only thing I added was Craisins to our muffins.


We have other informative camping lists on our blog also.

Tuesday, July 16, 2013

Light Summer Garlic Beer Chicken

Hamburger, chicken, pork, fish, seafood, lamb, goat, deer, pheasant...you name the meat we probably cook it around here & so I am always looking for different ways to cook, make & prepare these meats. In a rush to make supper tonight & didn't really plan on anything in particular I was looking through my fridge to see what I had on hand. I am not usually the kind of person that can throw ingredients together & it actually tastes good - my husband can I can not :( But tonight it actually turned out really good & I am very glad I thought of it, because it can be used in soooo many different ways to make so many meals!

What I did was take
1. 4 chicken breasts sprinkle them with garlic salt & lemon pepper seasoning and added 1 can of beer to them and allowed them to marinate in the fridge for 15 minutes while I preheated my oven to 450 degrees.

2. After the chicken breasts had marinated & the oven is preheated I transferred the breasts into a covered casserole dish & let it cook in the oven for 25 - 30 minutes, until the chicken is cooked through.

3. Take the chicken out of the oven & shred it all apart.

4. I added about 2-3 heaping TBSP. of plain Greek yogurt, 2 diced up tomatoes and a handful of shredded cheese to my shredded chicken.

5. Mix it up & you are ready to enjoy!

Tonight I served this over left over baked potatoes that I had left over from last nights supper. I diced up the potatoes laid them on a cooking sheet, sprayed with cooking spray, lay them in a single layer & baked them in my 450 degree oven for approximately 10 minutes. Remember they are already cooked potatoes, so I just had to warm them up & then I wanted to get a nice light brown color on them. After the potatoes were done I simply put a spoonful of the Garlic Beer Chicken mixture on top of the potatoes & served it with a salad & fruit of choice.

Other tasteful ways to serve this Garlic Beer Chicken:
1. Over Chips
2. Over lettuce for a salad
3. Make enchiladas
4. Over Pasta
5. Over Toast
6. Make Chicken Tacos
7. Over rice
8. Make Chicken taco salad
9. serve it inside a warm croissant for a sandwich
.........the possibilities are almost endless

Wednesday, July 10, 2013

Healthier comfort food - Corn dogs

 I am always trying to find new creating, inventive, fun & healthier ways to recreate the comfort kid foods that my daycare kids go crazy for. Of course the favorites of the kiddos around here are macaroni & cheese with hot dogs, pizza, tacos, sloppy joes, peanut butter & jelly sandwiches and corn dogs. And I have no problem serving those items - with a twist, they are homemade & healthier than what you buy in the store & what they are accustomed to, but so far they have like most of my recreations :)

Today's meal plan was Mini corn dogs, string cheese, a big helping of mixed fruit topped with light Cool Whip & 4-5 BBQ chips. This was my first time making these mini corn dogs for the kids & they ate them all up, so must have been successful!


My re-created Healthier Mini Corn dogs
Turkey dogs boiled until cooked through, cut them in half (to make mini dogs) & then wrap them up in wonton wrappers. You could stuff some cheese in there if you so choose, but I did not. Finally I baked them in a 350 degree oven for roughly 15 minutes & that is it. Eat, enjoy, dip in mustard or ketchup if you so choose.

Tuesday, July 9, 2013

Easy as 1,2,3 Dessert

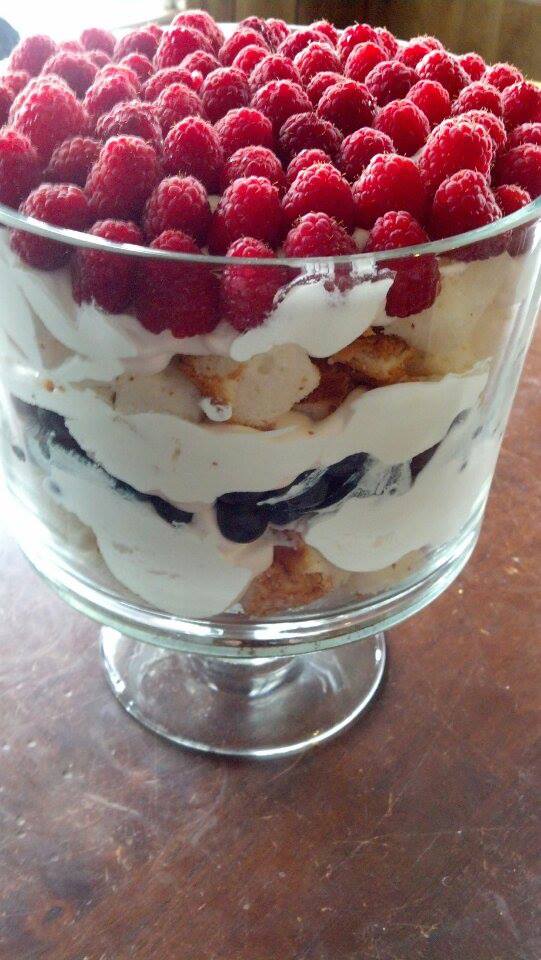
Here is an extremely easy, quick, delicious, light, & half way healthy dessert. All you need is 3 ingredients!! I needed something to bring to our family Fourth of July potluck & I had like no time to make something gourmet, so I looked around my house to see what I had on hand . Even though I had no time I wanted it to appear I had spent hours on it, thinking about it & creating it and of course I wanted it to be festive in red, white & blue...... this is what I came up with.


You want to create this? You can it is SUPER EASY & made with things you probably have on hand already

Ingredients:
1 Box of Angel food box cake
1 1/2 big containers of light Cool Whip
Fresh Fruit

Directions:
1. Make angel food cake as directed on box & let cool completely
2. cut the cake up into bite size pieces
3. start with a layer of angel food bites, then a layer of cool whip, then I did a layer of fresh blueberries
4. repeat the angel food bite & cool whip layer  then add your fresh raspberries on the top
5. eat & enjoy!!!

Thursday, May 30, 2013

How to feed 9 kids a well balanced meal

 During the day I have many hungry young kids that are always STARVING by lunch time even though they get a hearty breakfast and a snack in between breakfast and lunch & it is my job to ensure they eat a good, well-balanced meal with many options. I do monthly meal planning for my family for suppers along with lunches for my daycare kiddos. Once a month I do the monthly shopping for both the pre-planned supper & lunch men for both my family & my daycare. Let me start off by saying yes monthly meal planning is a lot of work in the beginning & may seem over whelming, but I believe it is SO WORTH IT in the end. And yes preparing the monthly shopping list for both my family & daycare is like running a marathon (well actually I don't run & have never & will never come close to running a marathon, but this is what I think it might be like) :) composing the list of all ingredients needed, seeing what is on sale to plan your menus around those items, & finding the best deals on things to save - every little bit helps to save.
I am a firm believer in giving kids options, having them try new things once, & making sure they have a well balanced menu throughout the day. Think of the rainbow when preparing a plate whether it be for yourself as an adult or for the kiddos, you may be surprised what they might eat! Today for daycare lunch is one of the kids' favorite meals - fish sticks, & although the fish sticks are necessarily healthy the kids love them & I supply many other healthy options for them to eat alongside the fish sticks. Each meal we have is consisted of a protein, fruits & vegetables & yes we  like love our cheese :)  So here is what they had today: 3 fish sticks, homemade purple coleslaw, fresh boiled peas, smoked Gouda & Colby Cheese, a pickle slice, & 1/4 of an apple served with milk. If the kiddos finish their plates they are free to have seconds of what I have left over.
So this is how I feed 9 STARVING young, growing, energetic kiddos with only one box of 22 fish sticks :)

Enjoy & remember to let the rainbow inspire you & always let your kids try new things - they might surprise you!

Monday, April 29, 2013

Event Planning

Everyday I wake up literally excited to plan....plan the day's routine, plan some kind of a wedding, plan activities for the kids to keep them busy - I just love planing. I enjoy being organized, staying busy all day, & coming up with new twists on "old things" that we have always done to make it seem new & fun for everyone (ex: fruit & vegetable bar, tacos, or even sandwiches).

The mind of a party planner is constantly running a million miles a minute with ideas they have for various events, but what I enjoy the most of all, that I truly believe will make any event a huge success, is all the details. Details people, details! 

I like to entertain whether is for a large group of people or for my closest friends and family. This past weekend my husband & I decided to have a small get together at my house with our closest friends. We wanted to have one big social event where we could all get together enjoy the spring weather that has finally shown up here in ND, & just let loose a bit before all of our schedules get so crazy busy for the summer time. 


Appetizer type finger foods was clearly going to be the best type of foods to have for our party.  I didn't want it to be fancy since we are all pretty laid back. I just wanted it be comfortable, enjoyable for all, & wanted people to let loose. So here is the menu I had planned for the night.

Food
1. Various Chips & crackers with homemade salsa or pico de gallo recipe, spinach & herb dip, and a hot pepper dip made by my friend
2. 6 different types of cheeses
3. Graham Crackers or Nilla Wafers that you could dip in the Key lime ball or the cheesecake dip I made to go with them
4. Crock pot meatballs
5. Ham & pickle tortilla roll ups
6. Home made pretzel bites
7. Fresh Strawberries & Blackberries
10. Spinach cups made by my sister -in-law
11. French Bread with a ham & pickle dip also made by my sister-in-law

You can't have a well planned event without a well stocked drink station
1. Various Pops
2. Cherry Vodka
3. Smirnoff
4. Mikes Hard lemonades
5. Kinky
6. X-Rated
7. Crown Royal Black
8. Penalton
9. 8 different types of wine
10. Homemade Wine Slush
11. Malibu
12. Beer

And to top it off we had a beautiful, calm, nice night so we got to have a bonfire :)

So no matter what type of event, or the size of the event you have to think of all the details to ensure your guests have an outstanding time! Happy planning!!!


Wine Slushy

 Spring has finally sprung here in ND, I mean it is only 2 days away from May so It should be here right???? Well we Finally got some nice weather & I intend to enjoy it to the fullest!

My 3 little kiddos are my life & they grow up way to fast, so I cherish the time I get to spend with them & we love to be outside all day long  taking it all in. Today we played in their huge sandbox making LEGO Chima castles (can you tell I have a couple boys the obsess about LEGO's), jumping on the trampoline, playing basketball & baseball, riding bikes, playing tags & of course riding horse. After a long day of playing with the kids I enjoy just sitting & relaxing at night either by a campfire (like I was this past weekend), hanging out with friends, or just relaxing on the couch but wherever I may be at I like to relax with a glass of wine in my hand, although this weekend I decided to try something a bit different. I decided to make a wine slush. Who doesn't enjoy a slush on hot days, add wine & it has to be delicious right??

Wine Slushy
1 bottle of white wine of your choice ( I used a semi sweet white wine)
3 cups of fruit blended ( I used mixed frozen fruit that had been thawed since that was what I had on hand)
1 wine bottle of diet 7up
Hand full of ice


1. Pour the bottle of wine into a pitcher
2. Blend the fruit& hand full of ice til it is smooth
3. Pour the fruit into the wine
4. Add the 7up to the fruit & wine mixture
5. Mix well  & you can either enjoy as it is or put it in the freezer for a couple hours to harden up!

It is easy & delicious! Great summer time drink!

Monday, April 22, 2013

So God Made a Farmer....

 With it being Earth Day today I thought it would be an appropriate time to share this post.

 For those of you who actually know me, know that I am a farm girl & very proud of it! My Husband & I (when I can) run our farm operation every day as tho it is Earth Day, making sure to get the most amount of food out of each acre while trying to improve the soil & always teaching our children about where their food comes from.

Did you know that today's American Farmer feeds about 155 people worldwide, in 1960 that number was 25.8? Or that farmers & ranchers receive only 16 cents out of every dollar spent on food at home & away from home. The rest goes for costs beyond the farm gate: wages, materials for production, processing, marketing, transportation & distribution. In 1980, farmers & ranchers received 31 cents! Find many more Fun Farm Facts here.


Earlier last week I had the pleasure of being able to work along side my husband helping him load the semi trailer with corn that was combined this past fall from our fields & stored in the grain bins until now. Here are some pictures of the day I got to spend with him & remember to Thank a Farmer!


Treat every day as Earth Day as we do here at White Heart Family Grain!


Wednesday, April 3, 2013

Skinny Mini Me Bite Size Cheesecakes


Skinny Mini Me Bite Size Cheesecakes
Even though there may be plenty of snow still on the ground  & it is now April which means that usually we are about ready to get into the fields, we are still trying to stay positive and THINK SPRING! What better way to celebrate spring than with delicate, delicious, skinny, bite sized, topped with fresh fruit cheesecakes???? Is your mouth watering yet, because mine is!
Like I have mentioned in my earlier blogs I am trying to lead a healthier way of eating lifestyle, so I searched for a way to make cheesecake healthier & came across many recipes. Some of them sounded ok & others did not sound appealing at all - cottage cheese in my cheesecake, NO THANK YOU! So what I did was take bits & pieces from a few recipes to come up with my own &I must say they are delicious! In the last two weeks I have made 4 batches - my daycare kids love them for a snack, my kids love them & even my husband eats them right up. 

Ingredients:
Reduced Fat Vanilla Wafers
8 oz. package of 1/3 less fat cream cheese (room temperature)
6 oz. container of flavored Greek yogurt (I like raspberry or strawberry myself)
1 oz. box of sugar free vanilla  pudding
1/4 skim milk
8 oz.Reduced Fat Cool Whip
Fresh Fruit

Directions:
1. In a large mixing bowl, combine the flavored Greek Yogurt with the cream cheese & beat with mixer until creamy & smooth in texture.
2. In a separate small bowl whisk the pudding & the milk together.
3. Add pudding mixture to the yogurt & cream cheese mixture. Blend until creamy & smooth.
4. Fold in Cool Whip
5. Put a vanilla wafer in the bottom of each mini muffin or cupcake holder in your pan to act as your crust & add the cheesecake mixture on top of that. Refrigerate for about 4 hrs. to set up a bit.
6. Top with fruit,eat & enjoy!!!

Here they are in the mini muffin pan & done refrigerating

The great thing about this recipe is that you can customize it to fit your taste buds - there are MANY ways of doing so, I listed just a few of them, but be creative!

1. Use any Flavor Greek yogurt you prefer
2. Substitute the vanilla pudding for banana pudding or some other kind
3. Only have plain Greek yogurt on hand - no problem use strawberry flavored cream cheese instead of plain cream cheese
4. Top the cheese cakes off with drizzled chocolate, caramel or butterscotch
5. use flavored cool whip instead of the original cool whip


Wednesday, March 20, 2013

Sweet Potato Chocolate Chip Cookies


I love the fall season for many reasons: the temperature in my area is just perfect, the beautiful colors on the trees, the smell of harvest in the air, the thought of the aroma of pumpkin, spice & everything nice filling up my home is calming, relaxing, & peaceful.

Even though you may be picturing someone sitting on their deck enjoying a relaxing afternoon with a steaming hot pot of coffee, a good book & one of these sweet potato cookies in their hand.....I am not that person :) I am not a coffee drinker, nor do I get a chance to relax on a deck in the fall, & I have never been a big book reader, BUT I do LOVE these sweet potato cookies.

I came across this decedent recipe for sweet potato chocolate chip cookies one day when I had an abundance of sweet potatoes laying around that needed to be used & I wanted a new & interesting way to use them & here is what I found. I made a few revisions to the recipe.

I know what you are thinking vegetables in my baked goods, come on now that is sinful & you would be right - it is sinfully GREAT! I love, love, love these & can't get enough of them. they are great for fall or winter & since they have vegetables they are better for you so why not indulge...right?

Ingredients:
1/2 cup boiled & mashed sweet potatoes 
2 cups all purpose flour
1 1/2 tsp baking powder
1 tsp baking soda
1tsp ground cinnamon
1/2 tsp allspice
1/4 tsp nutmeg
2 large eggs
1 cup backed brown sugar
1/2 cup vegetable oil
2 tsp pure vanilla extract
1 cup mini chocolate chips

Directions:
1. preheat oven to 350 degrees. Place parchment paper on baking sheet & set aside.

2. Cut sweet potatoes into cubes &place in just enough water to cover them & boil until soft when pierced with fork.

3. Pour the water & cooked sweet potatoes into a blender & puree smooth.

4. In large bowl, mix dry ingredients together. Set aside.

5. In medium bowl, whisk eggs & sugar together. Add oil & vanilla , whisk again. Fold in pureed sweet potatoes.

6. Add egg mixture to dry ingredients & mix them together.

7. Fold in chocolate chips.

8. Scoop cookie dough (I used my ice scoop scoop to keep them consistent) onto your baking sheets lined with parchment paper.

9. Bake on middle rack for 10-12 minutes or until the "bounce" back when you touch the tops of them.

10. Let cool completely on wire rack. Enjoy with a big glass of milk!


When I make these I triple the batch. Begin by rolling the dough into "logs" & wrap each log in wax paper & clear plastic wrap & put them in the freezer for later use. This way when I have unexpected company, have an event that I need to bring baked goods for, or just have a craving, I can pull the "log" out of the freezer, let them thaw overnight & bake as indicted above.


Monday, March 18, 2013

Health..ier Fleischkuechle

I am a German through & through which means I love my dough, more specifically fried dough :) Although I am not on a diet per say I am just trying to eat a bit healthier without feeling deprived. I don't want to have to make a separate meal for myself & another for the rest of my family, so I try to find a compromise. I have been craving fleischkuechle, but knew I didn't want or need the deep fried dough part of it, so I decided to try my hand at making a little bit healthier, and here is what I have come up with. These were super easy, fast, & everyone loved them which means they will be made again in my household :)

Ingredients:
 1lb. Browned Turkey "hamburger" or plain hamburger
1/4 - 1/2 an Onion chopped
2-3 large Garlic cloves chopped
Salt & pepper to taste
Season-ALL salt to taste
Egg Roll wrappers


1. Brown the turkey hamburger.
2. Add the chopped up onions & garlic, sat, pepper, & season-ALL mix in good & let it simmer for about 5 minutes to let the flavors soak in.
3. Get out your egg roll wrappers. Lay it so it looks like a diamond.
4. Put meat in the middle of it but leave room around the edges to seal it up.
5. Wet all the edges of the egg roll wrapper with water or a egg white/water mixture. ( I used just pain water & it worked out great).
6. Fold the diamond shape wrapper in half so it is now a triangle.
   ( I also made bite size, dipping size fleischkuechle for the kids out of won ton wrappers, so those are the smaller ones)


7. seal the edges with your finger tips & re-damped around all the edges.
8. Repeat until you have desired amount of fleischkuechle that you would like.
9. Put prepared fleischkuechle on a pan in a 400 degree oven for 10-15 minutes until it is golden brown. I sprayed the top of mine with Pam first to help give it that beautiful golden color.


10. Serve hot with ketchup of course. Enjoy!

Simple, fast, easy & loved by all, what more can you ask for????